March 25, 2018
Easter is fast approaching, and with it the time for potica, one of those festive dishes that since the old days has presented a lot of fun for its eaters and a total nightmare for those delegated to be in charge of its preparation, usually God-fearing wives and mothers. Here let us not forget that Angelca Likovič, a presidential candidate whose main concern was to persuade raped women to find their happiness in giving birth to the children conceived in this manner, offered herself as an example of a good Slovenian wife by posing with potica.
Luckily we live in different times now, and despite certain attempts to bring the potica struggles back to everyday life, this cake, if it really needs to decorate the festive table, can be bought in a pretty much every supermarket in the country.
Nevertheless, we decided to commit a culinary coup d'état, take the field and bake our own version of the classic, rewriting the rules a little. These are to make a great tasting potica and sacrifice some of the traditional technical standards of what it is supposed to look like, mix in the best of each Slovenian region, and also allow ourselves to make some beginners’ mistakes and procedural shortcuts.
In order to achieve this we focused on the filling, which tends to be richer in the Western part of the country and over the border into Italy, where a significant Slovenian minority lives, significant enough that the dish, here known as gubana, has become an Italian culinary standard. As such, our major concern was not in making potica nice and smooth on the outside and boringly bread-like on the inside, but instead a highly rich nutritious desert, the kind one can only afford to make from time to time.
The filling of the Western part of Slovenia, where potica is called gubana due to its traditional snail-shell shape, is usually quite dry, but includes various additional ingredients of the Mediterranean region, such as pine nuts and candied orange and lemon peels, and we decided to add some extra moisture in a form of fresh cream. This allowed us to change the filling to dough ratio in favour of the filling, causing the slices to stay in one piece once the cake was cut.
For the dough we also decided to choose a richer version in terms of the amount of butter and sugar added, to make sure that kids will eat the crust as well.
In the process, which was quite an experiment, we made several mistakes and deviations from the rules, some on purpose and others that we should avoid in the future, and all of which we kept a record of.
The result was perhaps one of best, if not the best, potica we have ever tasted, although the first glimpse when taken out of the oven might suggest the opposite.
So, here is how our gubana potica was made.
As we can prepare the filling a day ahead, let’s begin with that. The first thing to do here is to soak two fists of raisins in a bowl of rum. We can leave them there for quite a while, overnight preferable, but since we were eager to complete our mission ASAP we soaked them for only an hour or two at most. Because we wanted to have a lot of rum in the filling we had to pour some straight into the mixture instead, which worked out very well.
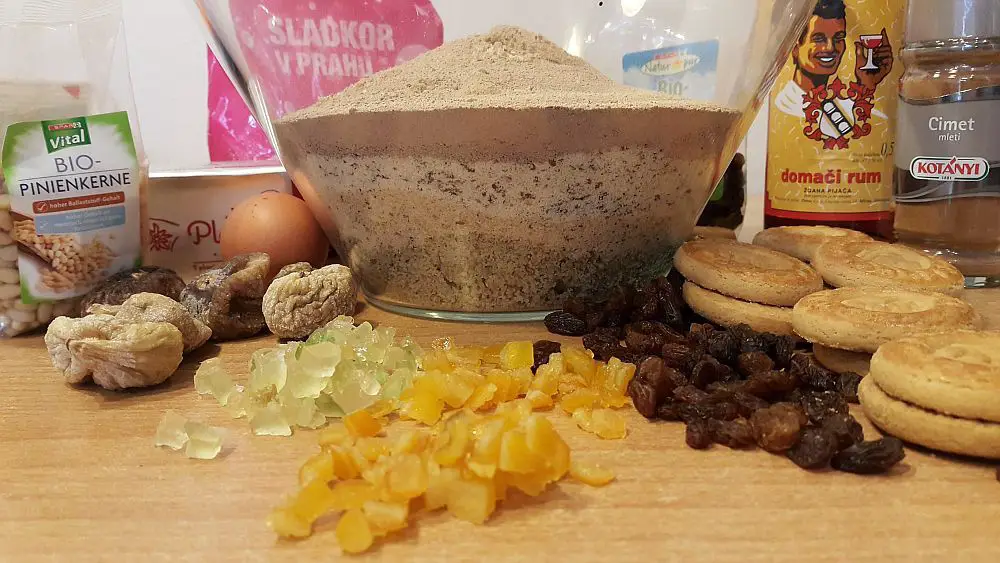
Filling ingredients: fresh cream is missing from the picture, in the bowl we can see a layer of walnuts, a layer of almonds, and a layer of hazelnuts, topped with a bag of chocolate powder.
Ingredients (filling)
200 g ground walnuts (the bag we bought contained this much so this is what we added)
200 g ground almonds
200 g ground hazelnuts
100 g powdered chocolate
150 g pine nuts (fried/soaked in butter)
120 g raisins (soaked in rum)
Several crushed cookies (fried/soaked in butter)
Candied lemon and orange peel
100 g butter
Several chopped soft dry figs (optional)
Cinnamon to taste
Rum or perhaps some good brandy
Vanilla sugar
Sugar to taste (optional)
Fresh cream to soften the mixture
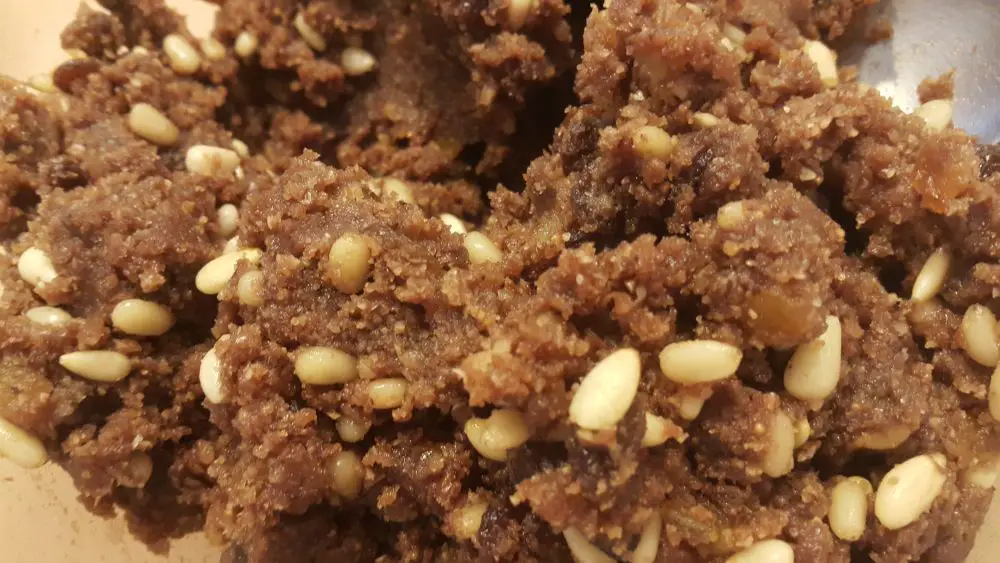
The texture of the mixture after fresh cream was added.
The mixture was left covered in the refrigerator overnight and was quite fun to make, with everybody who saw it volunteering to inspect if the flavour was right. Of course, and especially if you like to add a lot of rum, which we did, then keep this away from children till it’s baked and the alcohol evaporates, as we believe this is what eventually happens.
Now to the most difficult part of the project, at least so they say, the dough, and we apologize for not having a picture of the ingredients we used here, but they are not that many nor exotic, and you can easily imagine what they looked like.
Ingredients (dough):
500 g of sifted white wheat four
30 g of fresh yeast
1 dl milk
200 g butter
1 whole egg and 1 egg yolk (save the egg white for coating the cake)
150 g of powdered sugar
grated peel of 1 lemon and 1 orange
a little salt
Procedure:
Dissolve the yeast in slightly warm milk, add a pinch of flour and a pinch of sugar and set aside for 20 minutes or until the mixture rises.
Mix the live yeast milk with most of the other ingredients, but not yet with the flour. In order to do this first melt the butter, but make sure it‘s not hot, let alone burnt. Also, before adding anything to the eggs, beat them first, or even better, separate the whites from the yolks and beat them separately.
We made several mistakes here that might have prevented, in addition to large amount of butter added, our dough from rising at a fast enough rate: we mixed the eggs kind of sloppily, our butter was rather too warm, and we added sugar to the flour instead of eggs, and we’re not really sure what impact this had on the finished product. Once this is all done, in the right way or wrong, you then stir this mixture of yeast milk, eggs, butter, grated lemon and orange peel, sugar and salt into the flour.
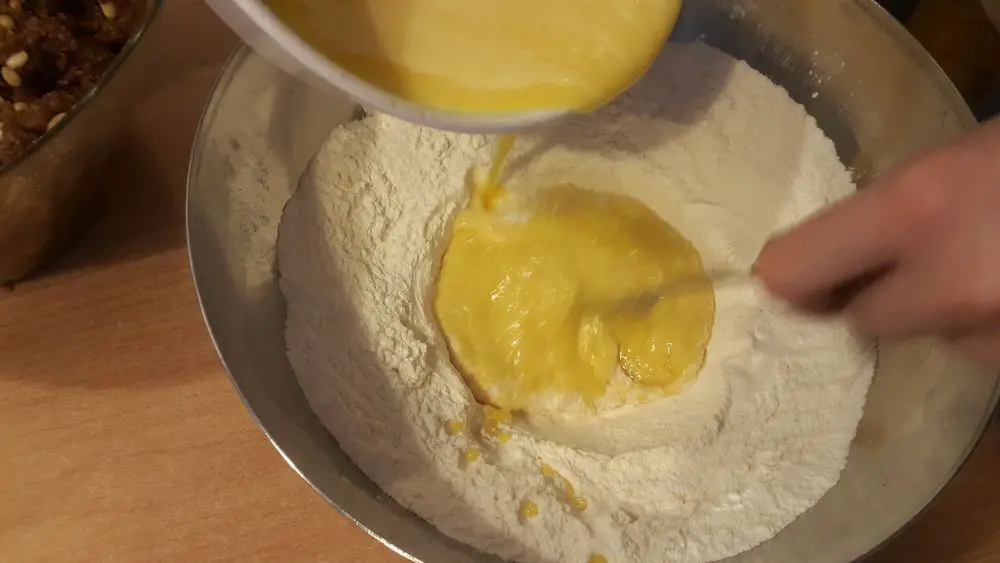

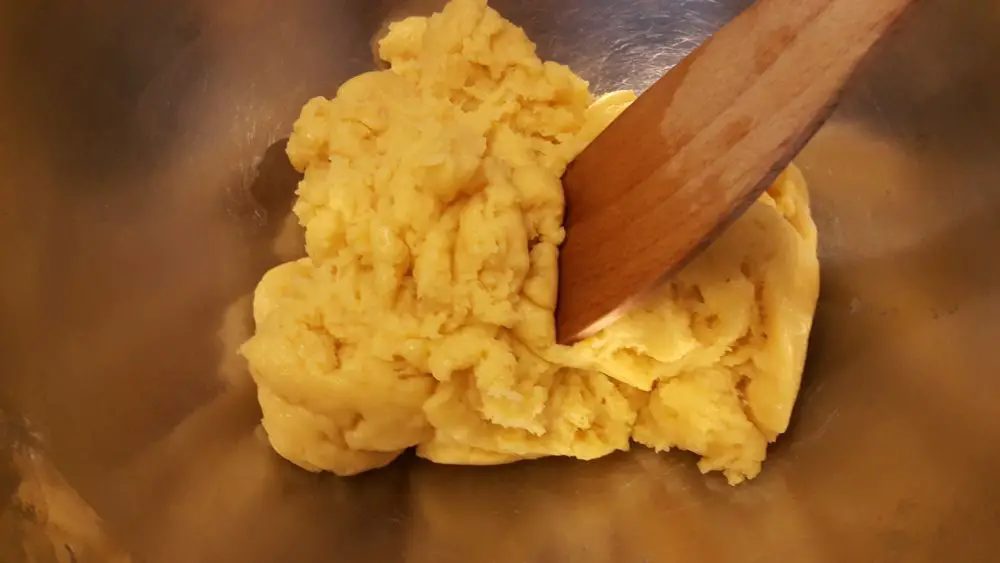
After the dough ingredients are more or less in one lump one is supposed to knead them until the dough becomes “elastic”, which usually occurs when the cook’s arms become sore. Although we did a bit of kneading it soon became clear that our buttery dough would never become elastic, but rather crunchy instead when taken from the oven and cooled. Which was OK, since elasticity was not our main goal in the first place.

We were a bit concerned with the prospect of the dough rising enough, as we didn’t want our potica to turn out as some sort of a version of Ljubljana pancakes. We thus put our dough to rest to see if it would rise at all. The usual potica dough is supposed to rise at least to a double size in a few hours of resting, which ours didn’t; so we put it in a warm oven (about 40 degrees Celsius) and then it did rise a bit, but still not much. It did, however, become much fluffier, and since it was getting late we decided to take a chance and just move to the next step.

Slightly inflated dough
Next, place the dough onto a tea towel or other clean cloth that has been sprinkled with flour. We were worried our dough would stuck to the fabric, so we put too much flour on it (and then didn’t bother to sweep it off when the gubana was rolled – something we’ll avoid the next time we make it, to prevent a cake with a hard-baked bottom). The cloth allows you to easily roll the dough and offers some support when the potica needs to be moved to the baking tray. Roll the dough into the rectangular shape of the cloth, and sprinkle the dough with some flour to prevent it from sticking to the rolling pin.

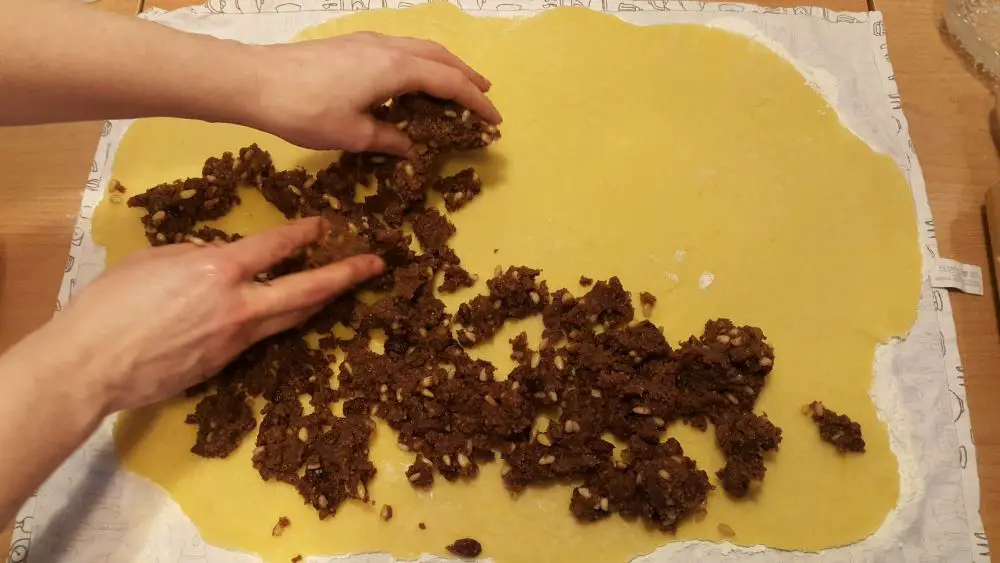
Time to add the filling.


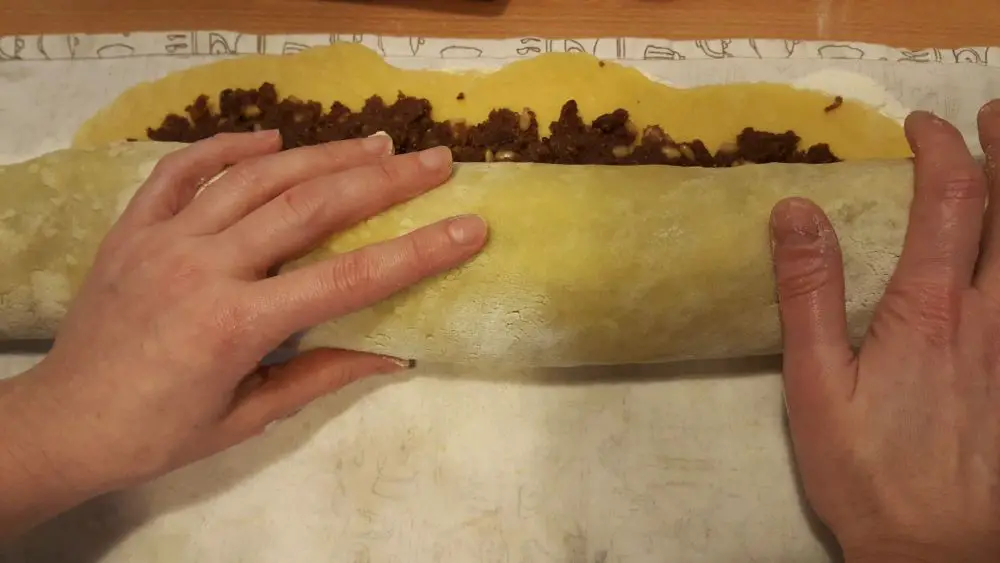
Place the potica in a baking tray that has been covered with baking paper, roll it into a shape of a snail shell and put it to rest and rise for a while. We were a bit worried here, as our gubana wouldn’t rise again. But it did turn out, on the part of the dough, quite fluffy and crunchy at the same time, which was what we were aiming for all along.

Brush off the excess flour
Meanwhile, preheat oven to about 180 degrees Celsius. Before you place your gubana potica into the oven, pierce it several times with a toothpick or fork to prevent the surface breaking, although if following this recipe it will almost certainly break. If you don’t want it to break, you’ll have to choose some other version with a more bready and “elastic” dough.
Also, beat the remaining yolk and spread it across the surface of the potica, then sprinkle some crystal sugar on top. Bake for about 40 – 60 minutes, and we left ours in the oven for a whole hour as it looked quite thick. However, observe the colour of the pastry shell, and take it out if it starts turning dark.
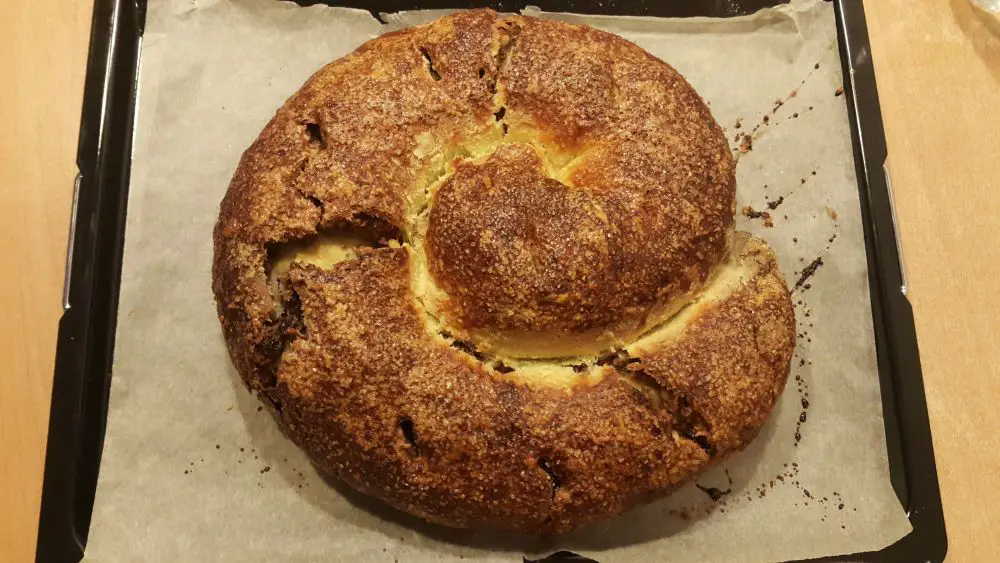
Our delight is someone else’s horror: our gubana potica broke in several places. Angelca Likovič would not approve.
Now that the potica is baked, we have to leave it to cool down, which will take at least overnight. Do not get too eager like we did and just cut into it while still warm, and this is why:

A big mistake: cutting potica while still warm makes a total mess of it, although a delicious mess, all the same.
This is how it‘s supposed to look when cut (when cutting, don’t press but saw back and forth, as if cutting bread):
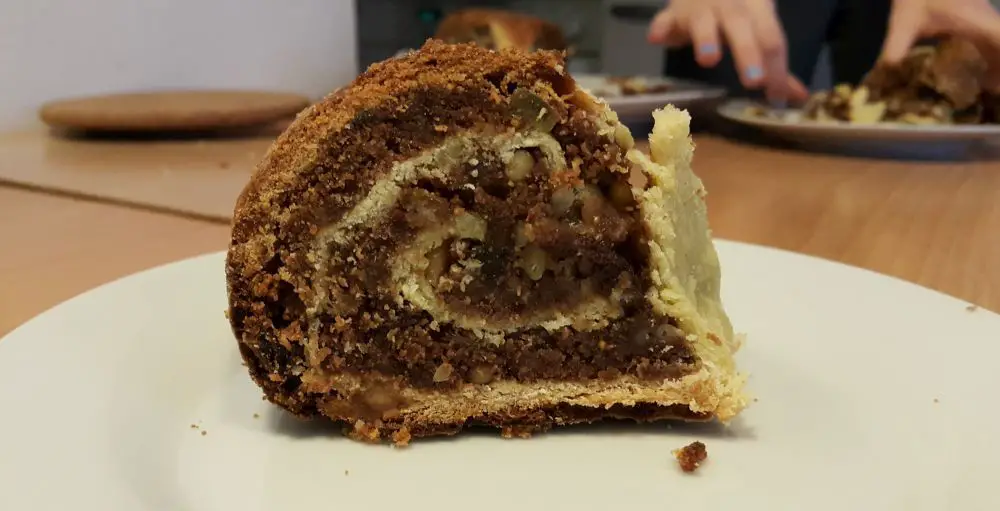
Our gubana potica the next morning. The breakfast of champions.
Potica is supposed to last a few days at least, getting better with each day. Some sprinkle gubana with alcohol after it’s baked, claiming it can be thereby preserved for weeks. We couldn’t test any of that, however, as our gubana potica disappeared in less than a day, and we’ll have to make another one soon. For scientific purposes only, of course.
Dober tek!


